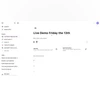
Microsoft-backed artificial intelligence company OpenAI has announced a new “Projects” feature for its chatbot ChatGPT. As part of its ongoing “12 days of OpenAI” announcements, the newly introduced Projects feature offers a more efficient way to organise chats in ChatGPT.
ChatGPT Projects: Details
Projects in ChatGPT function like a folder, enabling users to save all their chats on a specific topic together for easier access.
Projects appear in the side panel on the left, where users can edit the title, set a colour for the project icon, and customise the project to make it more recognisable. In addition to grouping chats on the same topic, users can upload files and save instructions to customise ChatGPT’s responses within that specific project. Users can also add existing chats to a newly created project.
The new Canvas interface and ChatGPT Search are also accessible within Projects.
Also Read
ChatGPT Projects: Availability
Projects in ChatGPT are now available to ChatGPT Pro, Plus, and Team subscribers on the ChatGPT Desktop app for Windows and on the ChatGPT web. It should be noted that the feature works exclusively with the GPT-4 model.
The company has announced that the feature will be rolling out to Enterprise and Edu users in January and to Free users soon.
ChatGPT Projects: How to create
- In the side panel on the left of the conversation interface in ChatGPT, hover over the new Projects section and tap on the “+” icon.
- Name your project in the floating interface that appears and click on “Create project.”
- The new Project interface will appear on the main screen.
ChatGPT Projects: How to customise
- Click on “Add Files” to add files that ChatGPT will have access to within the project.
- Click on “Add Instructions” to give custom instructions for tailoring ChatGPT’s responses within the project.
- Click on the folder icon at the top to change the icon colour of the project.
ChatGPT Projects: How to add chats
- Click on the three-dot icon next to the existing chat in the side panel.
- Click on “Add to project” and select the name of the project from the dropdown menu.
- The chat will then appear under the selected project in the side panel.

)